Culling & LOD
The two biggest wins for a large scene both come down to the same idea: don't spend effort on detail the viewer won't notice. Culling discards objects the camera can't see before they ever become a draw call. Level of detail (LOD) swaps in a cheaper mesh as an object shrinks into the distance. Together they're what let the assembler push millions of instances at interactive frame rates.
Both features rely on the mesh bounding boxes you provide when registering meshes, so make sure your registerMesh calls include aabbMin and aabbMax.
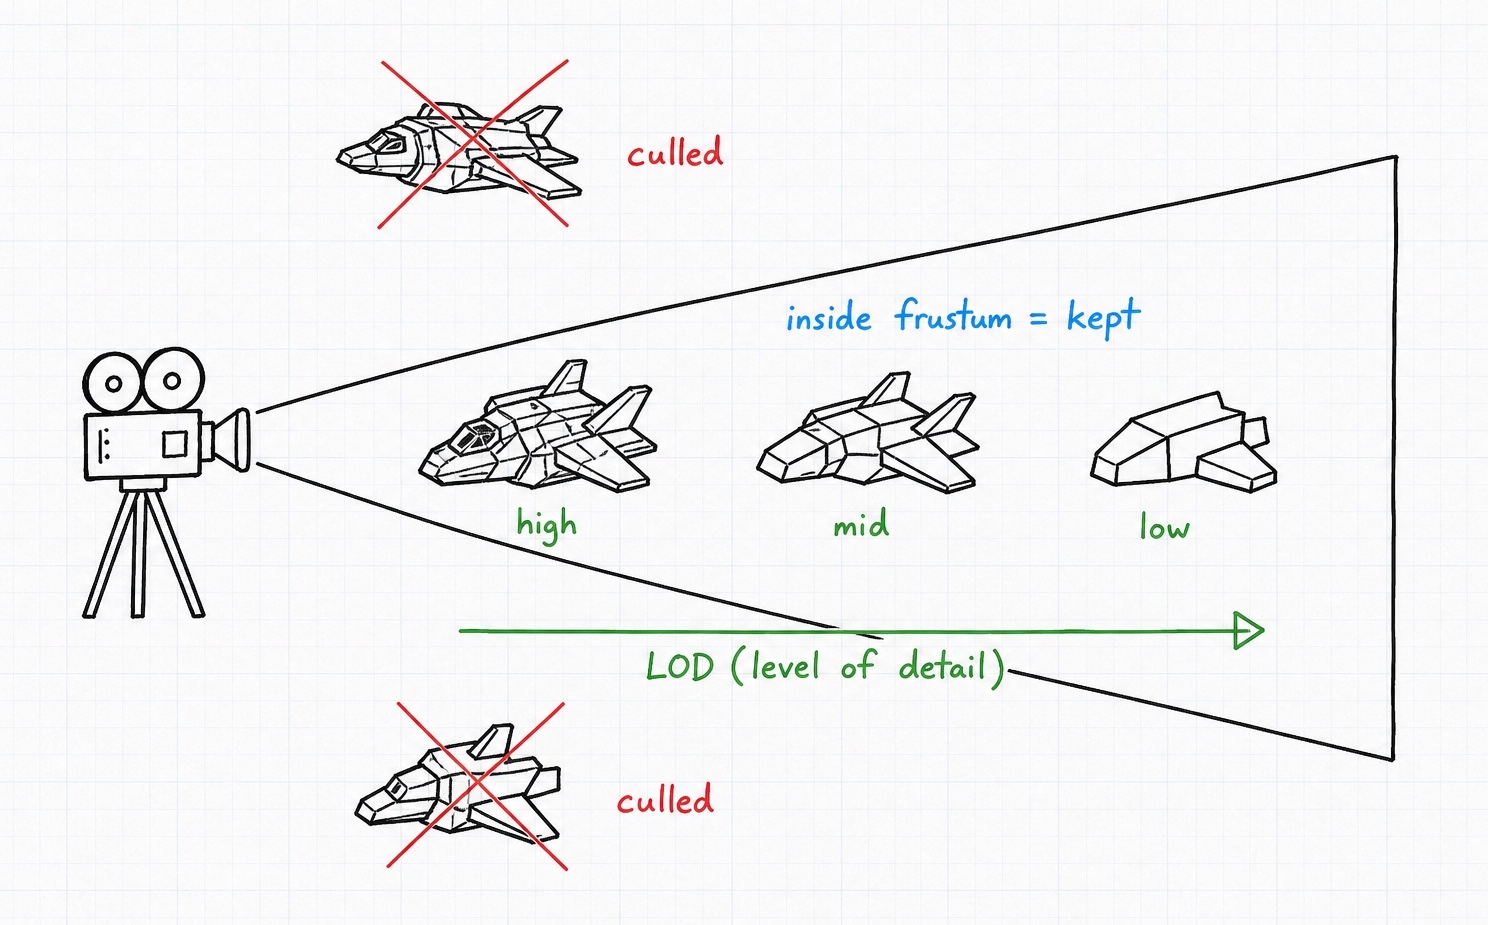
Here is the whole story for a single instance: test it against the frustum, and if it survives, pick the right level of detail for its distance before it is drawn.
graph LR
  I[submitted instance] --> F{inside the frustum?};
  F -->|no| X[discarded, never drawn];
  F -->|yes| L{distance to camera};
  L --> M[pick the LOD mesh];
  M --> R[drawn];
Frustum Culling
There's no point drawing what the camera can't see. Culling discards instances outside the view frustum before they ever reach a draw call, and for large scenes it's the single biggest win the assembler offers.
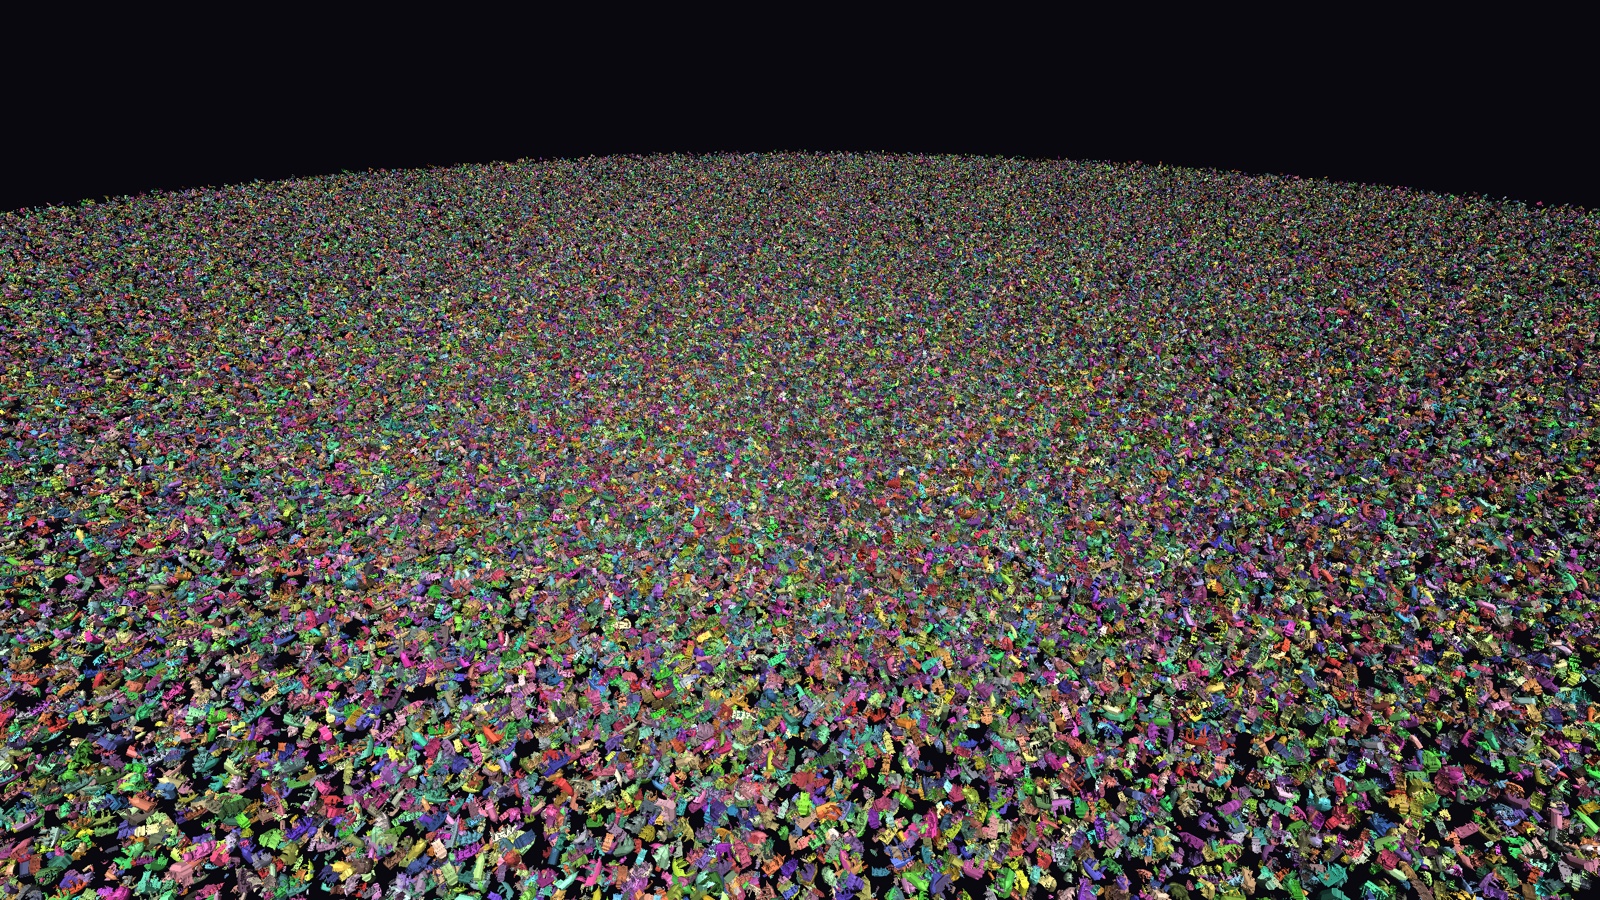
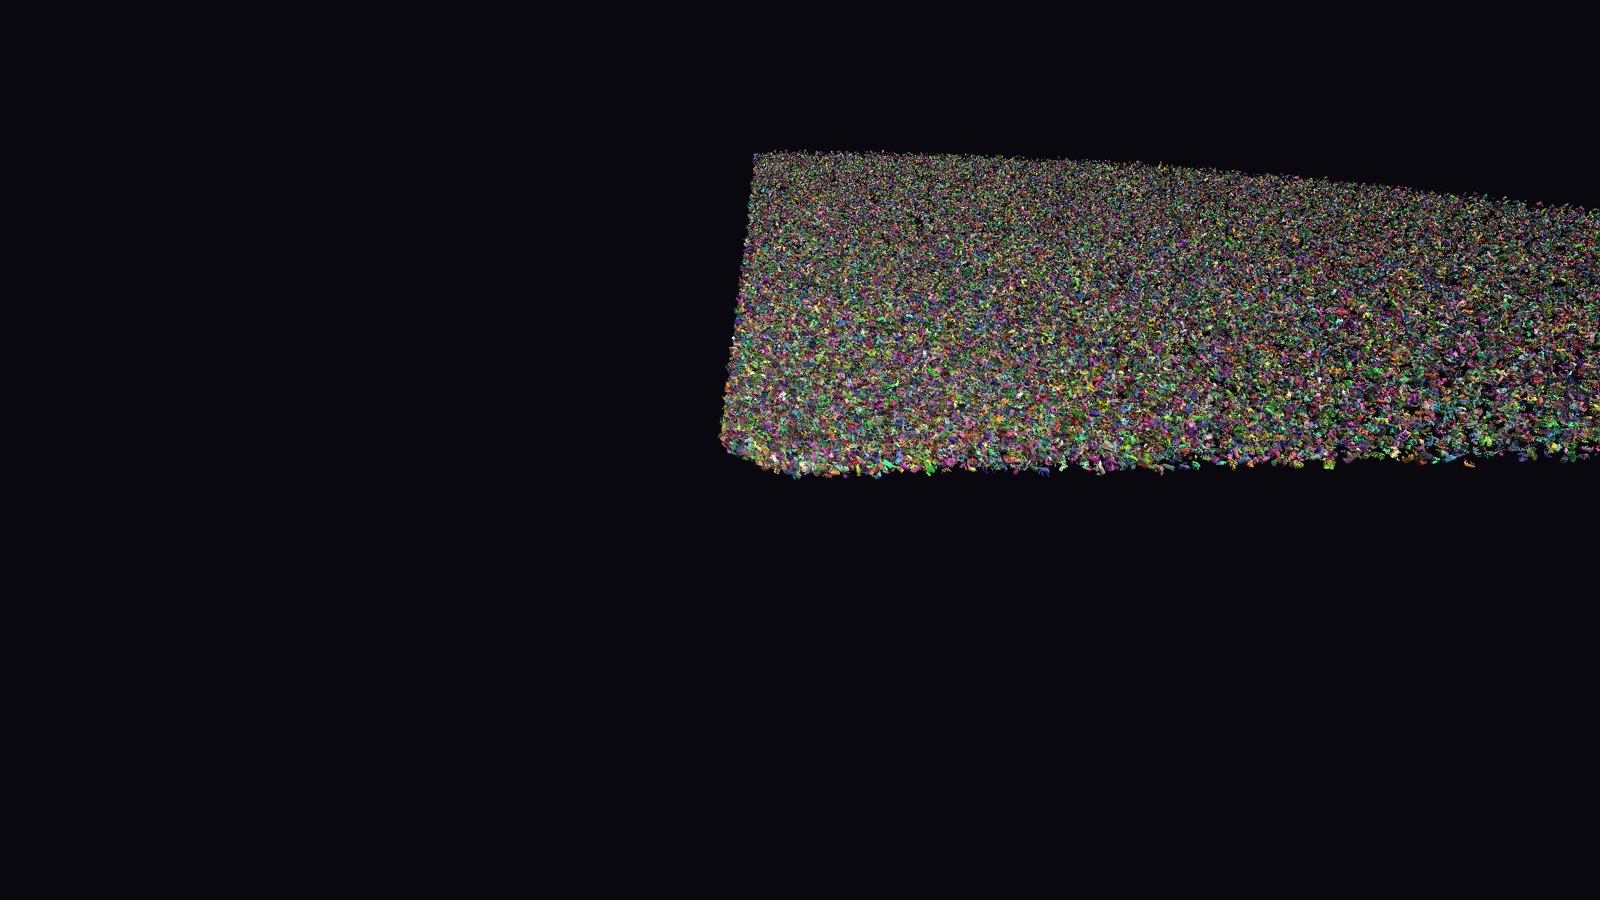
The two shots below are the exact same field from the exact same viewpoint. The only difference is culling. With it off, every submitted instance is drawn; with it on, only the instances inside the camera frustum survive (here the frustum was frozen and then viewed from the side, so you can see the slice that remains).
The simplest way to enable it is to hand the assembler your camera each frame. It derives the frustum from your view and projection matrices automatically:
setCameraData does triple duty: the position drives LOD selection, and the view and projection matrices drive both sorting and frustum culling. For culling to actually remove anything, remember to register your meshes with bounding boxes, since that's what gets tested against the frustum.
If you'd rather compute the six frustum planes yourself, you may set them directly as Vec4 values (each a plane equation ax + by + cz + d = 0):
Tip
A manually set frustum sticks around. If you later call setCameraData() with only a position (no matrices), your manual planes are preserved, but a stale frustum previously derived from matrices is invalidated. When in doubt, pass the full camera each frame.
Culling Strategies
How the assembler tests instances against the frustum is up to you. Choose a strategy with setCullingStrategy:
use GL\Rendering\DrawCallAssembler;

// per-instance test each frame, the default
$assembler->setCullingStrategy(DrawCallAssembler::CULL_LINEAR);

// no culling at all
$assembler->setCullingStrategy(DrawCallAssembler::CULL_NONE);

// build a spatial octree once and reuse it across frames
$assembler->setCullingStrategy(
    DrawCallAssembler::CULL_OCTREE,
    octreeMaxDepth: 31,
    octreeMinLeafInstances: 16,
);
CULL_NONEskips culling entirely; every submitted instance is drawn. Fine for small scenes where nothing is ever off-screen.CULL_LINEAR(the default) tests every instance's bounds against the frustum each frame. It's O(n) but has zero setup cost, which makes it the right choice for fully dynamic scenes where instances move around constantly.CULL_OCTREEbuilds a persistent spatial tree over your instances and tests whole subtrees at once. The tree is built once and reused across frames; it's only rebuilt when the instance set actually changes. This is the strategy for large, mostly-static scenes where the camera moves but the geometry doesn't. It's how the asteroid-field demo culls 10 million instances down to a few dozen in about 2 ms.
The two octree arguments are optional tuning knobs (ignored by the other strategies). They only take effect when >= 0; pass -1, the default, to leave a value unchanged. octreeMaxDepth caps how finely space is subdivided (raise it for scenes that span a huge extent but cluster densely, so the dense cluster splits into small leaves instead of a few giant ones), and octreeMinLeafInstances stops a node from subdividing once it holds that few instances. Changing either rebuilds the tree.
If a particular instance should always be drawn regardless of the frustum, say a skybox or an always-on gizmo, submit it with the FLAG_IGNORE_CULLING flag:
$assembler->submit(
    meshHandle: $skyboxHandle,
    transform: $transform,
    materialId: 0,
    flags: DrawCallAssembler::FLAG_IGNORE_CULLING,
);
Level of Detail (LOD)
A ship that fills the screen deserves every triangle; the same ship two kilometers away is a few pixels and doesn't. Level of detail lets the assembler quietly swap in a cheaper mesh as an object recedes from the camera, with no branching in your submit loop and no bookkeeping on your side.
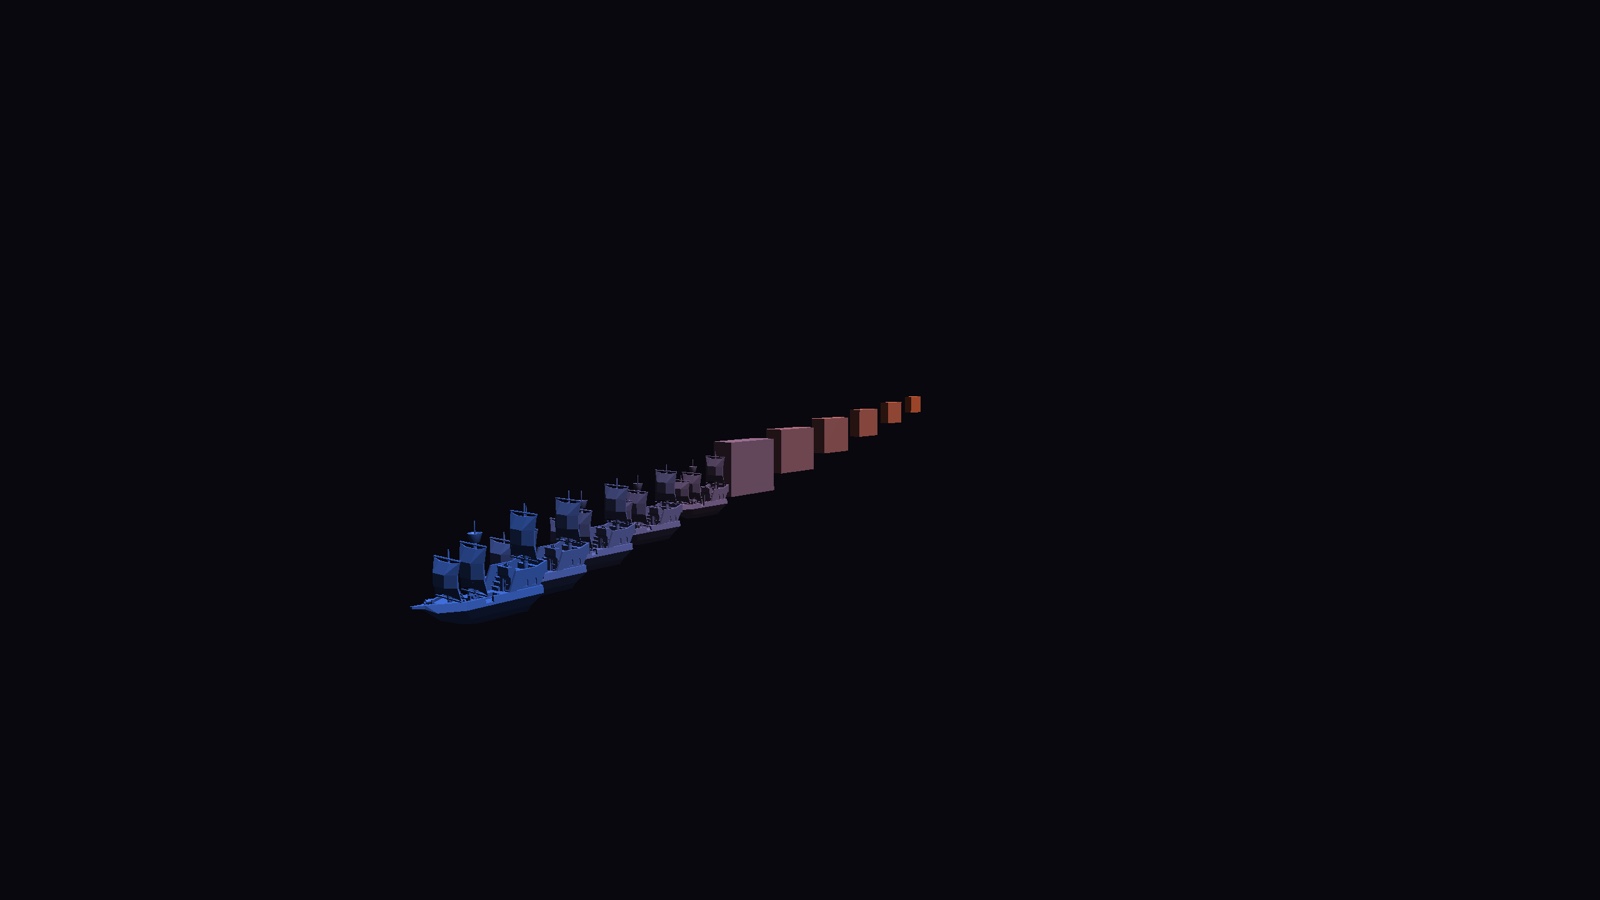
That's one row of the same ship marching into the distance. Up close you get the full model; past the LOD threshold the assembler quietly draws the cheap cube stand-in instead, and at that size you can't tell the difference.
You describe the swap points with a LOD table: a list of ascending distance thresholds, paired with the mesh handle to use past each threshold. Attach it to your base (highest-detail) mesh:
use GL\Buffer\{FloatBuffer, UIntBuffer};

// past 1000 units from the camera, draw the cheap cube instead of the ship
$thresholds = new FloatBuffer([1000.0]);
$lodHandles = new UIntBuffer([$cubeHandle]);

$assembler->setLodTable(
    meshHandle: $shipHandle,
    distanceThresholds: $thresholds,
    meshHandles: $lodHandles,
);
You can add as many levels as you like. Just keep the thresholds ascending and give a handle per level:
// near: full ship, mid: simplified ship, far: a billboard cube
$thresholds = new FloatBuffer([250.0, 1000.0]);
$lodHandles = new UIntBuffer([$shipMidHandle, $cubeHandle]);
$assembler->setLodTable($shipHandle, $thresholds, $lodHandles);
From then on, whenever you submit the base $shipHandle, the assembler measures each instance's distance to the camera position (the one you passed to setCameraData) and substitutes the appropriate LOD mesh. If you never set a LOD table for a mesh, or the table is empty, the base mesh is always used, so LOD is entirely opt-in per mesh.