Rendering a Cube
On the last page we drew a triangle and I made the bold claim that if you can draw a triangle, you can draw anything. A cube is six squares, each square is two triangles, so a cube is really just twelve triangles wearing a trench coat. Let's prove it and put our first real 3D object on screen.
We will build on everything from the triangle page: the window, the VAO/VBO, the shaders, and the draw loop are all still here. What is new is the third dimension, and with it three ideas we have not met yet: 3D vertex data, depth testing, and the model, view, and projection matrices that place an object in front of a camera.
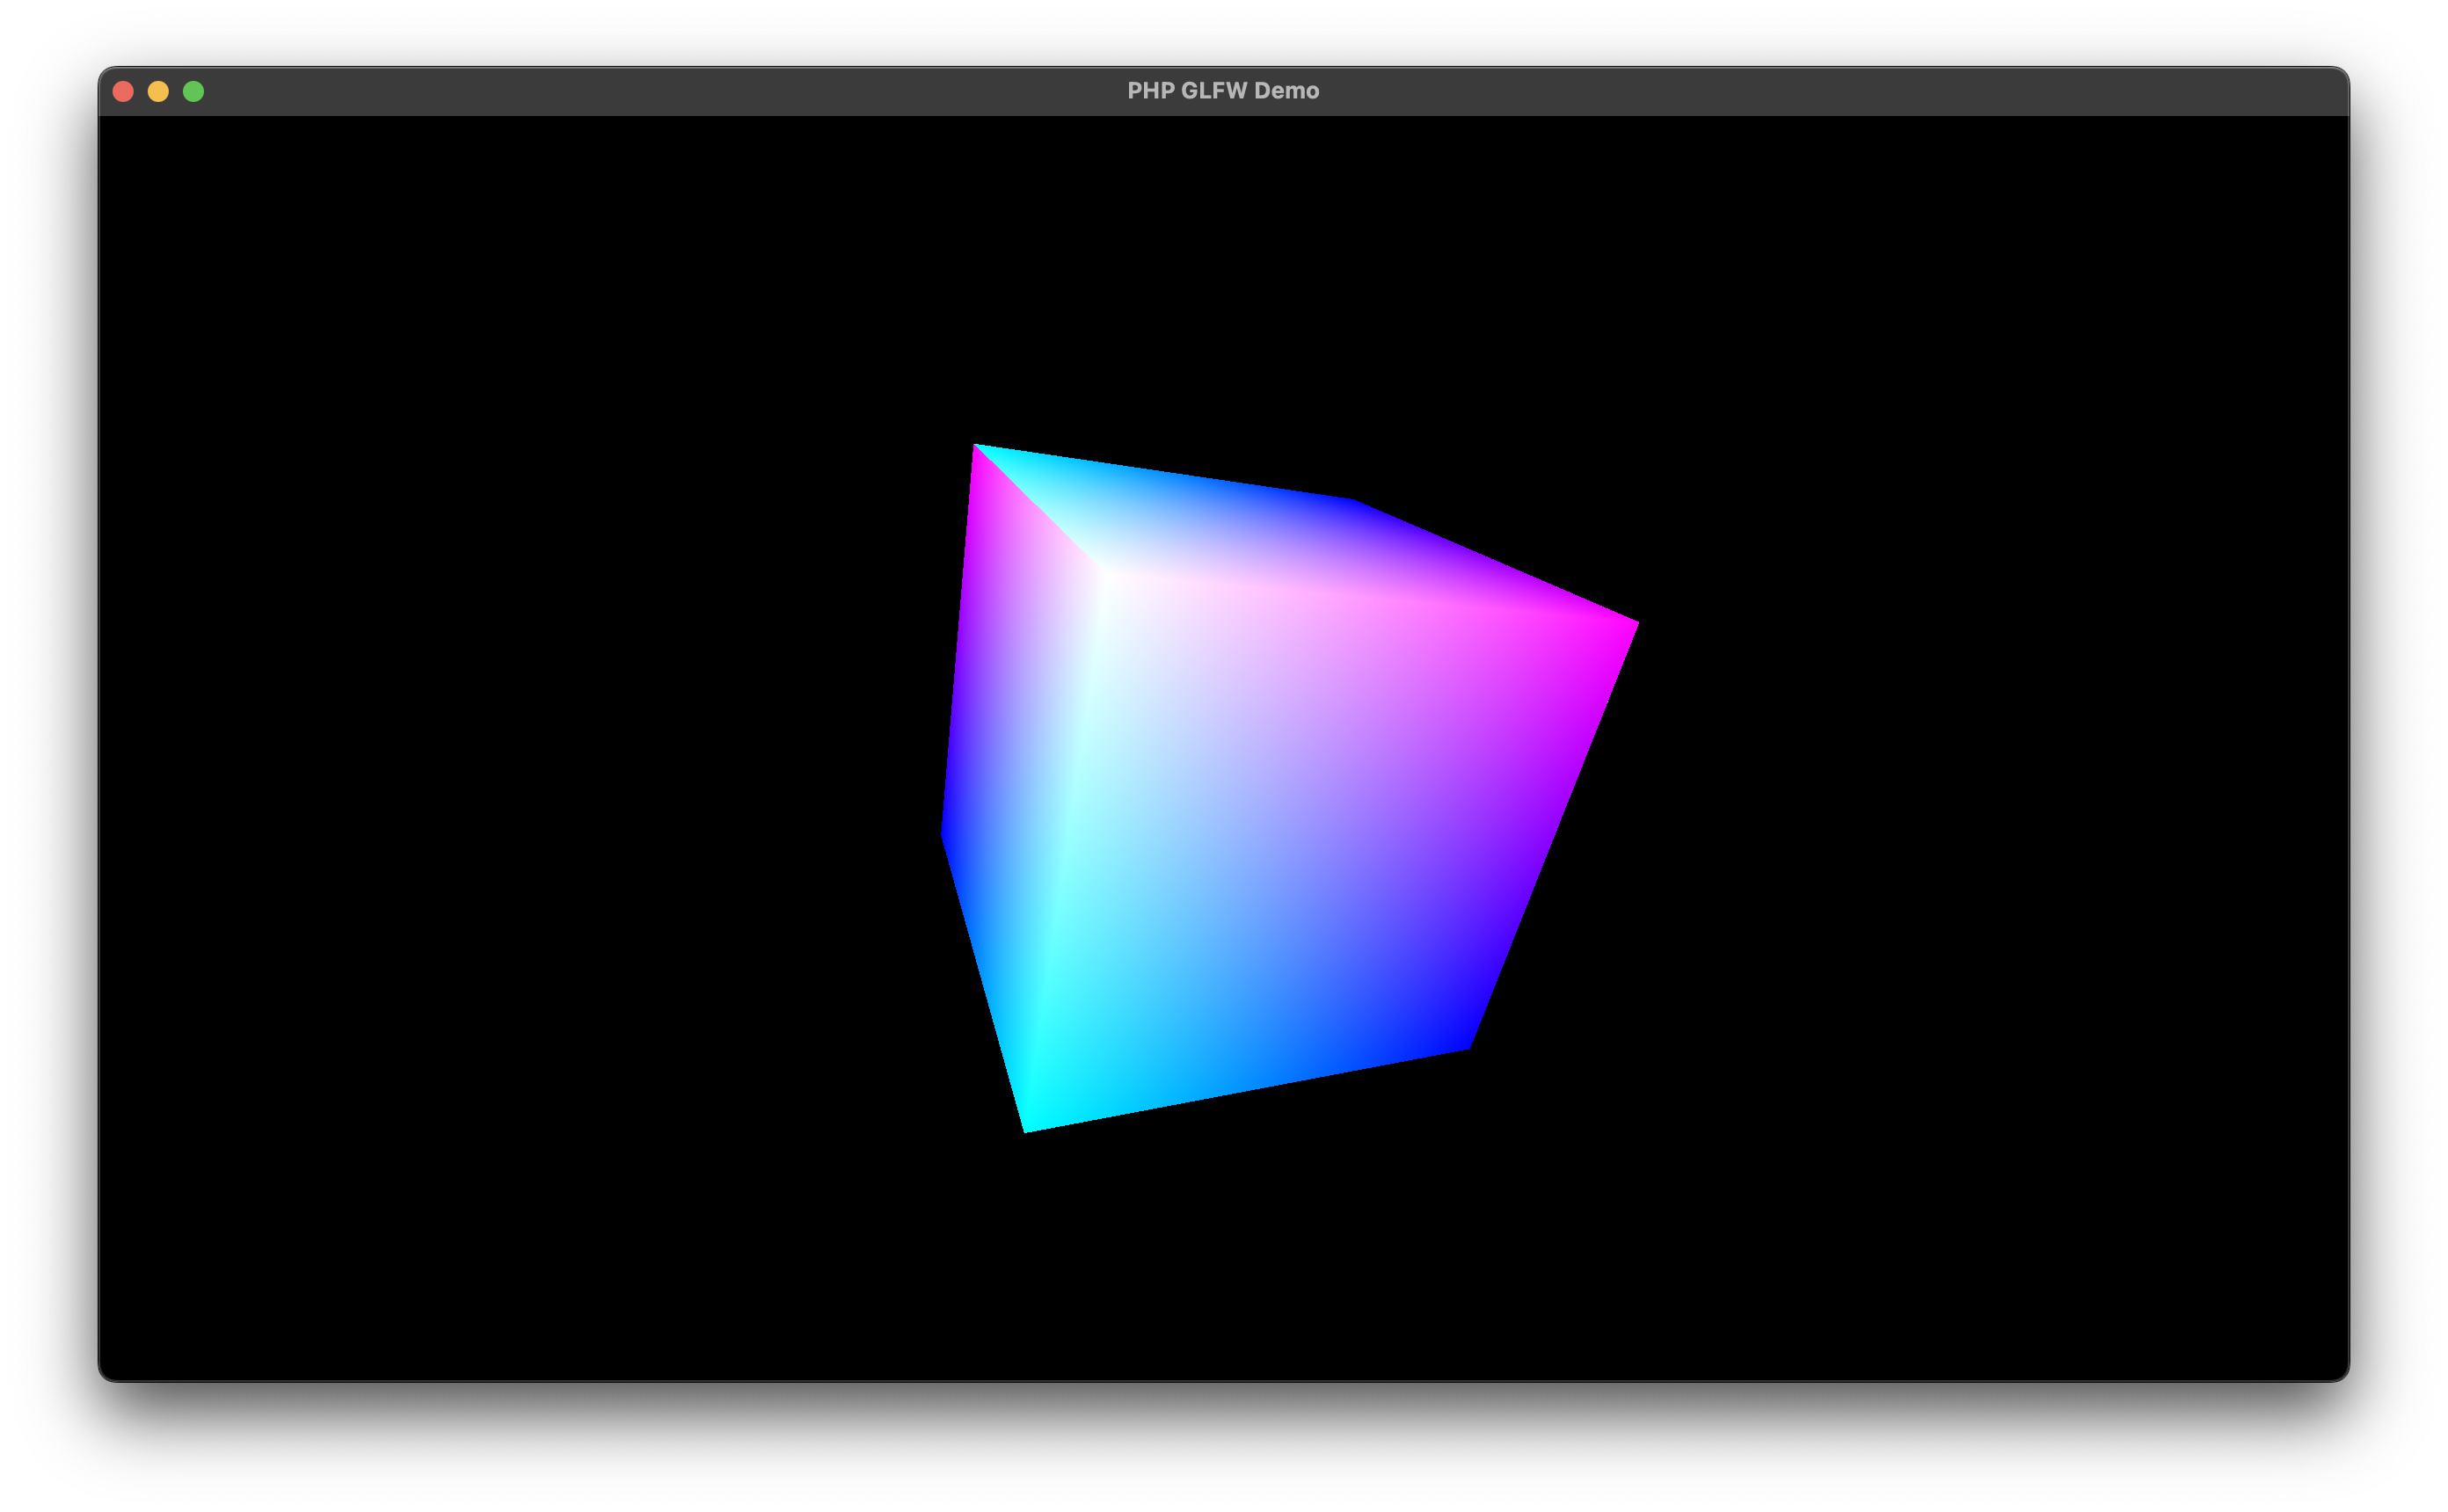
Full Source
This getting started tutorial is based on the examples provided with PHP-GLFW.
You can check out the complete source code here: 02_3D_cube.php
From a Triangle to a Cube
Our triangle was three vertices. A cube has six faces, and since the GPU only ever draws triangles, each face is split into two. That is 6 * 2 = 12 triangles, and 12 * 3 = 36 vertices in total.
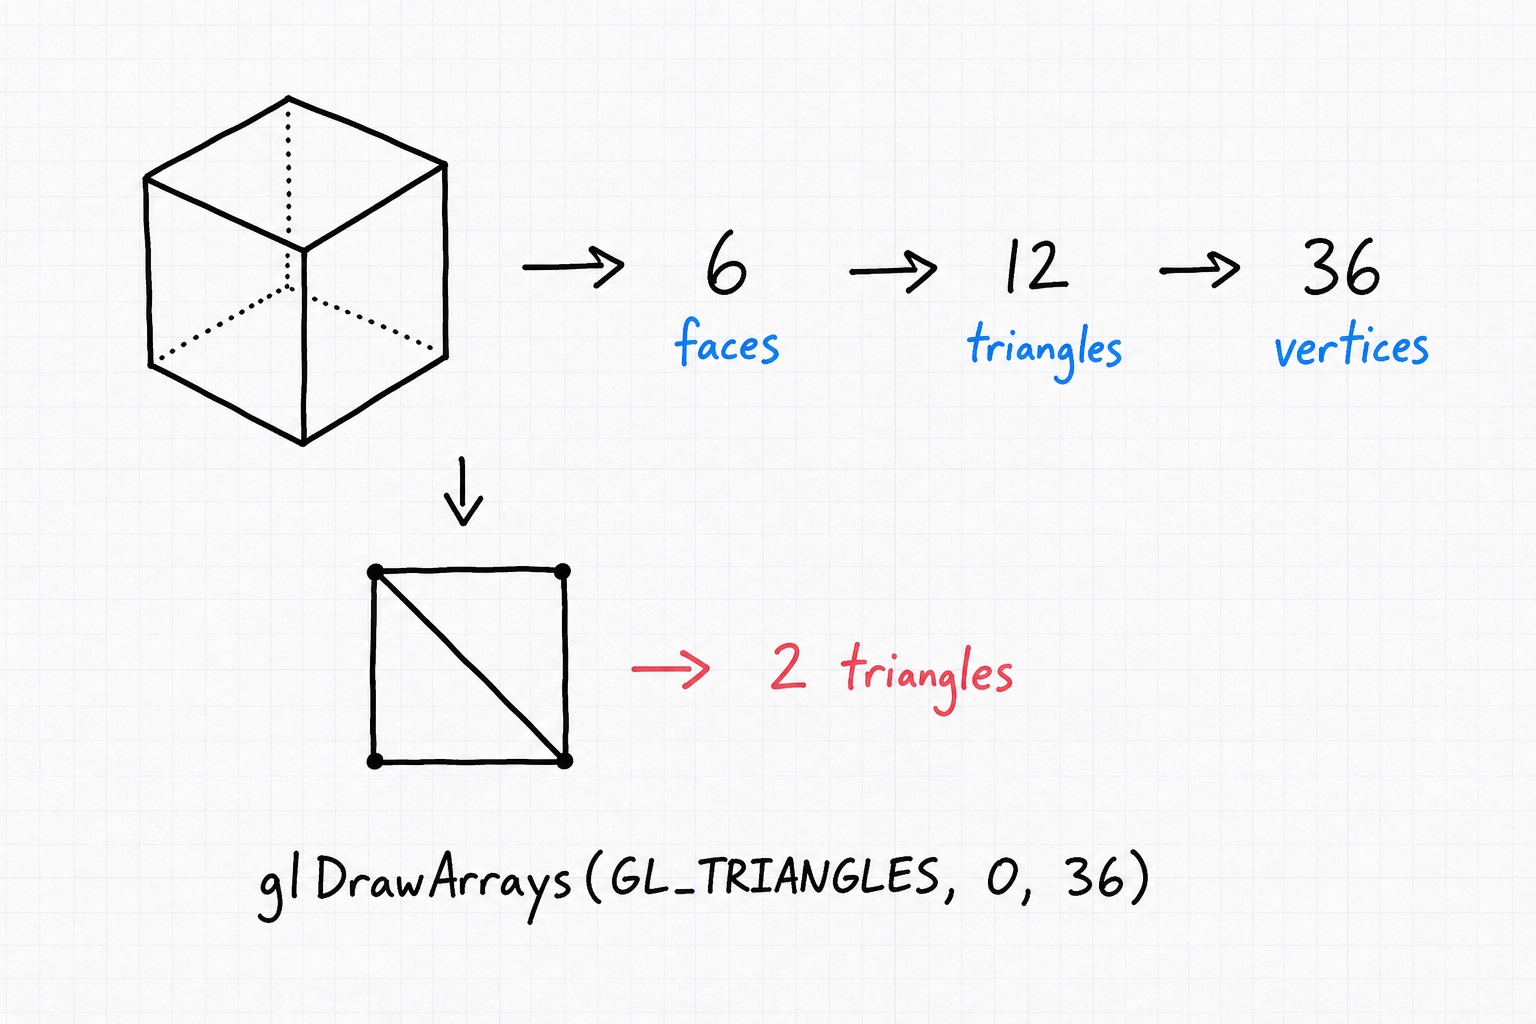
You may wonder why we repeat so many vertices instead of listing the eight corners once. We could, using an index buffer, and the geometry guide shows you how. For now let's keep it simple and spell out every vertex, so there is no extra machinery to reason about.
Each vertex carries a position (x, y, z) and a texture coordinate (u, v). We will use those uv values to color the cube later, so you can tell its faces apart without loading a texture yet. Here is the buffer, with the first face shown in full and the rest trimmed for space:
use GL\Buffer\FloatBuffer;

// a 1x1x1 cube centered on the origin: position (3) + uv (2) per vertex
$vertices = new FloatBuffer([
    // positions          // uv
    -0.5, -0.5, -0.5,      0.0, 0.0,
     0.5, -0.5, -0.5,      1.0, 0.0,
     0.5,  0.5, -0.5,      1.0, 1.0,
     0.5,  0.5, -0.5,      1.0, 1.0,
    -0.5,  0.5, -0.5,      0.0, 1.0,
    -0.5, -0.5, -0.5,      0.0, 0.0,
    // ... five more faces, 36 vertices in total
]);
The full list of all 36 vertices lives in 02_3D_cube.php; copy it from there so you do not have to type out every corner by hand.
Uploading and Describing the Data
This is the same VAO and VBO dance from the triangle page. We create the objects, bind them, and upload the buffer:
glGenVertexArrays(1, $VAO);
glGenBuffers(1, $VBO);

glBindVertexArray($VAO);
glBindBuffer(GL_ARRAY_BUFFER, $VBO);
glBufferData(GL_ARRAY_BUFFER, $vertices, GL_STATIC_DRAW);
The only change is the attribute layout. Instead of a position plus a color, each vertex is now a position (3 floats) plus a uv (2 floats), so the stride is 5 floats and the uv sits 3 floats in:
// position -> location 0
glVertexAttribPointer(0, 3, GL_FLOAT, GL_FALSE, GL_SIZEOF_FLOAT * 5, 0);
glEnableVertexAttribArray(0);

// uv -> location 1, starts 3 floats in
glVertexAttribPointer(1, 2, GL_FLOAT, GL_FALSE, GL_SIZEOF_FLOAT * 5, GL_SIZEOF_FLOAT * 3);
glEnableVertexAttribArray(1);

// unbind, we are done configuring
glBindBuffer(GL_ARRAY_BUFFER, 0);
glBindVertexArray(0);
If the size, stride, and offset arguments feel unfamiliar, the triangle page walks through them in detail.
The Third Dimension Needs Depth Testing
Here is the first genuinely new idea. A flat triangle never overlaps itself, but a cube is full of faces that sit in front of one another. Without help, OpenGL simply draws them in the order you listed them, so whichever triangle comes last wins, even when it should be hidden behind another. The result is a cube that looks inside-out and wrong.
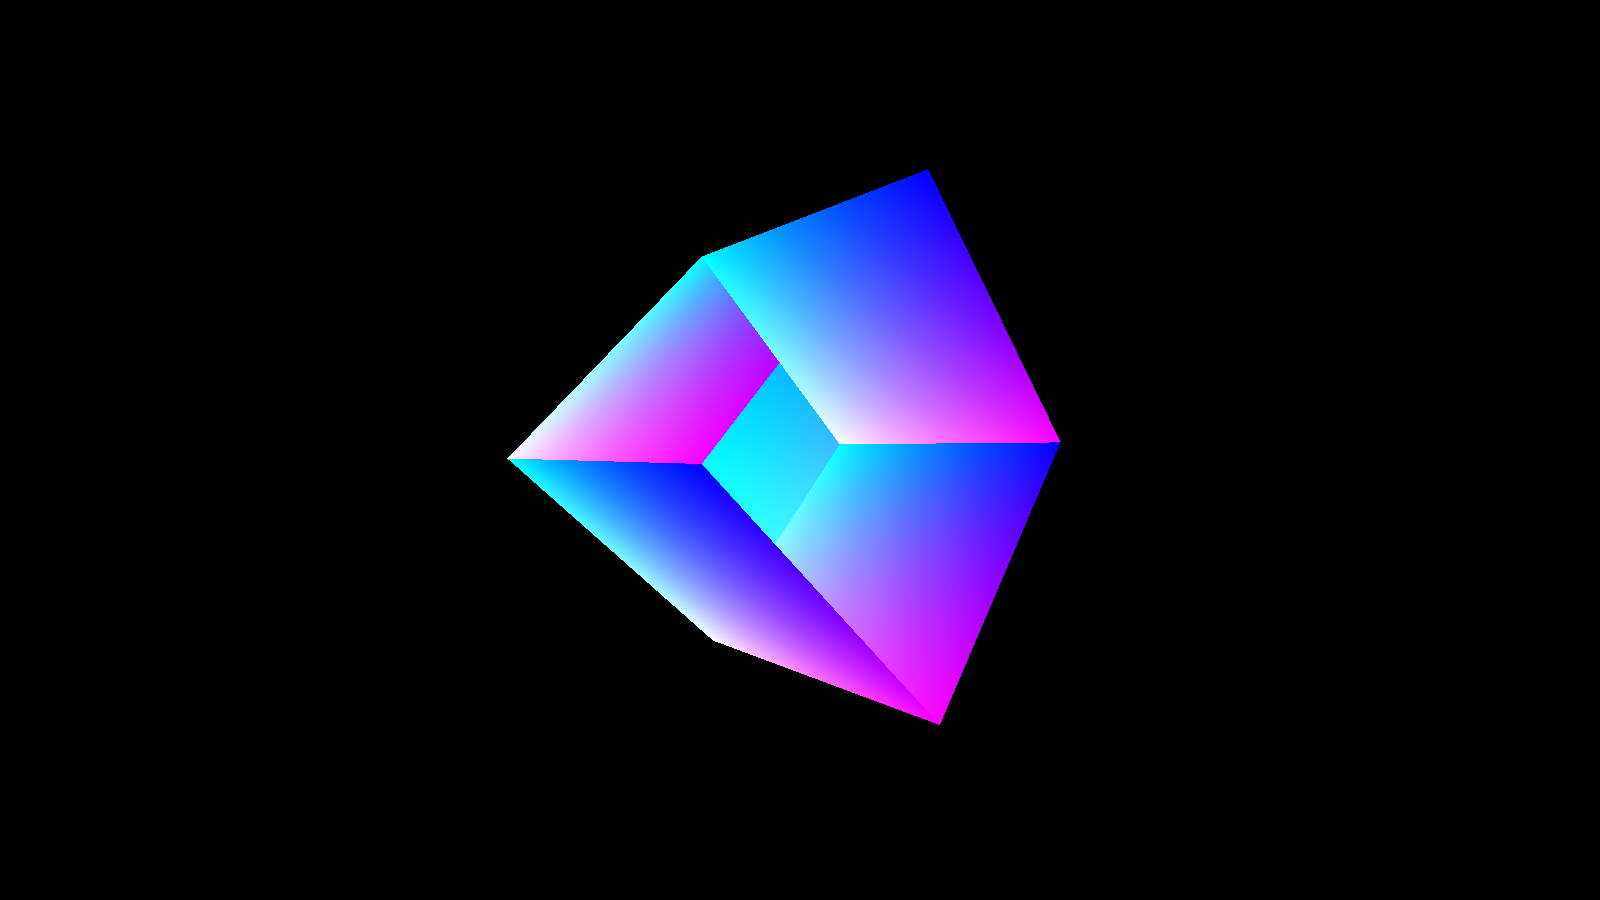
The fix is depth testing. OpenGL keeps a depth buffer alongside the color buffer, remembers how far away each drawn pixel is, and skips any pixel that would land behind one already there. You enable it once during setup:
glViewport(0, 0, 800, 600);

// we are drawing overlapping 3D triangles now, so let OpenGL
// figure out which ones are in front
glEnable(GL_DEPTH_TEST);
Clear the depth buffer every frame
Enabling depth testing is only half the job. You also have to wipe the depth buffer at the start of each frame, right next to the color buffer, or last frame's distances linger and your cube slowly stops drawing. Note the added GL_DEPTH_BUFFER_BIT in the draw loop below.
Placing the Cube in the World
Our triangle shader set gl_Position straight from the raw vertex, which only works because the triangle already lived in the -1 to 1 range OpenGL expects. A cube in the world is not that convenient: it sits somewhere, a camera looks at it from somewhere else, and perspective has to make far corners smaller. Three matrices handle exactly that, and every vertex passes through all three on its way to the screen.
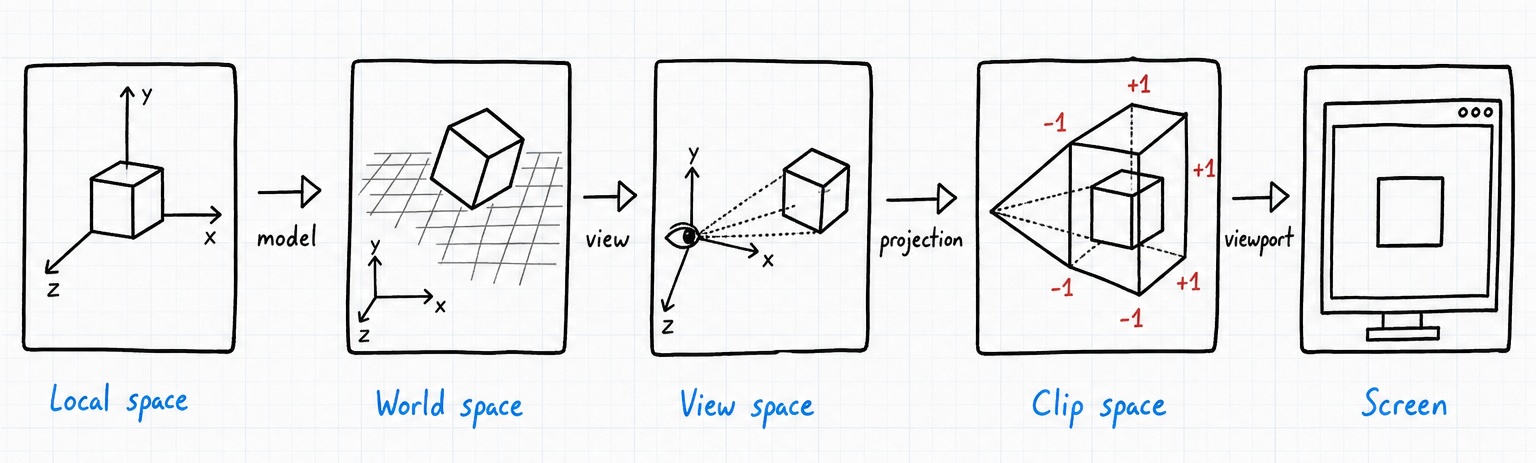
- Model places the object in the world. Where is the cube, how is it rotated, how big is it?
- View is the camera. Moving the camera back is the same as pushing the whole world forward.
- Projection flattens the 3D world onto your 2D screen and adds the perspective that makes distance shrink things.
Let's build the three of them. A fresh Mat4 starts out as the identity matrix, a clean slate you then transform. Because we want the cube to spin, we rotate the model matrix by the elapsed time, so it turns a little more every frame:
use GL\Math\{GLM, Vec3, Mat4};

// model: where the cube sits, spinning over time
$model = new Mat4;
$model->rotate(glfwGetTime() * 2, new Vec3(0.0, 1.0, 0.0)); // spin around y
$model->rotate(glfwGetTime() * 2, new Vec3(0.0, 0.0, 1.0)); // and around z

// view: the camera, pushed 2 units back so we can see the cube
$view = new Mat4;
$view->translate(new Vec3(0.0, 0.0, -2));

// projection: perspective onto the screen
$projection = new Mat4;
$projection->perspective(GLM::radians(70.0), 800.0 / 600.0, 0.1, 100.0);
The angles are in radians, which is why we pass degrees through GLM::radians(). The projection takes a field of view, the window's aspect ratio (width divided by height), and the near and far clipping planes.
That is deliberately the short version. If you want to really understand what each matrix does, why moving the camera means moving the world, and when to reach for lookAt() or ortho(), the Working in 3D Space guide takes it slowly, and the Matrices reference covers every method.
The Shader
The fragment shader is almost the same as the triangle's; it just turns the interpolated uv into a color so each face reads differently. The real change is in the vertex shader: it now receives the three matrices as uniforms and multiplies them with the vertex position to compute gl_Position.
#version 330 core
layout (location = 0) in vec3 a_position;
layout (location = 1) in vec2 a_uv;

out vec2 v_uv;

uniform mat4 model;
uniform mat4 view;
uniform mat4 projection;

void main()
{
    v_uv = a_uv;
    gl_Position = projection * view * model * vec4(a_position, 1.0);
}
#version 330 core
out vec4 fragment_color;

in vec2 v_uv;

void main()
{
    // use the uv coordinates as a color so the faces are easy to tell apart
    fragment_color = vec4(v_uv.x, v_uv.y, 1.0, 1.0);
}
Read projection * view * model right to left: the model transform runs first, then the view, then the projection, the exact journey each vertex takes in the sketch above. Compiling and linking these two shaders into a program works exactly as it did on the triangle page, so we will not repeat it here.
Sending the Matrices to the Shader
Uniforms are how you hand per-frame values to a shader. You look up a uniform's location by name once, then set its value. PHP-GLFW lets you pass a Mat4 object straight in, with no manual unpacking:
glUniformMatrix4f(glGetUniformLocation($cubeShader, "model"), GL_FALSE, $model);
glUniformMatrix4f(glGetUniformLocation($cubeShader, "view"), GL_FALSE, $view);
glUniformMatrix4f(glGetUniformLocation($cubeShader, "projection"), GL_FALSE, $projection);
One matrix, not an array
Use glUniformMatrix4f to send a single Mat4. There is also a glUniformMatrix4fv variant, but that one expects an array of matrices, which you would reach for when uploading many at once. For our three uniforms, the scalar form is exactly what you want.
The Draw Loop
Now we assemble a frame. Compared to the triangle loop, three things change: we clear the depth buffer as well as the color buffer, we rebuild the matrices every iteration so the cube keeps spinning, and we draw 36 vertices instead of 3.
while (!glfwWindowShouldClose($window))
{
    glClearColor(0, 0, 0, 1);
    // clear BOTH the color and the depth buffer
    glClear(GL_COLOR_BUFFER_BIT | GL_DEPTH_BUFFER_BIT);

    glUseProgram($cubeShader);

    // rebuild the matrices so the cube animates
    $model = new Mat4;
    $model->rotate(glfwGetTime() * 2, new Vec3(0.0, 1.0, 0.0));
    $model->rotate(glfwGetTime() * 2, new Vec3(0.0, 0.0, 1.0));

    $view = new Mat4;
    $view->translate(new Vec3(0.0, 0.0, -2));

    $projection = new Mat4;
    $projection->perspective(GLM::radians(70.0), 800.0 / 600.0, 0.1, 100.0);

    // upload all three uniforms
    glUniformMatrix4f(glGetUniformLocation($cubeShader, "model"), GL_FALSE, $model);
    glUniformMatrix4f(glGetUniformLocation($cubeShader, "view"), GL_FALSE, $view);
    glUniformMatrix4f(glGetUniformLocation($cubeShader, "projection"), GL_FALSE, $projection);

    // bind & draw the cube: 36 vertices, 12 triangles
    glBindVertexArray($VAO);
    glDrawArrays(GL_TRIANGLES, 0, 36);

    glfwSwapBuffers($window);
    glfwPollEvents();
}
The glDrawArrays(GL_TRIANGLES, 0, 36) call is the payoff: start at vertex 0 and draw 36 vertices as triangles. Because the matrices are rebuilt each frame from glfwGetTime(), the cube turns smoothly for as long as the window is open.
When the loop ends, clean up the resources we created, just as before:
Full Source Code
The full, runnable example is here: 02_3D_cube.php. Run it with:
Where to Go Next
You now have the core loop of every 3D renderer: geometry in a buffer, a shader, three matrices, and depth testing. From here you might:
- Give the cube a real surface with an image, see Rendering a Textured Cube.
- Go deeper on the math behind the three matrices in Working in 3D Space.
- Load real models instead of a hand-typed cube with the Wavefront Object Files parser.