Getting Started
Before we can start drawing anything, we need to create a window and create a context in which we can draw.
Please see Creating a Window for more information on how to create a window and a context.
We are not going to discuss the details of creating a window and a context in this tutorial.
PHP-GLFW already installed?
Follow the installation guide if you haven't installed the extension yet!
You can run this example by php examples/11_vector_graphics.php.
Creating a VG Context
To properly utilize the vector graphics API, we need to create a VGContext object. This object will hold all the internal state that the vector graphics state machine needs to operate. (You can have multiple.)
use GL\VectorGraphics\{VGContext};

// code to initalize GLFW and create a window here...

// initalize the a vector graphics context
$vg = new VGContext(VGContext::ANTIALIAS);
As you can see the VGContext constructor takes flags as an argument. In this example we pass VGContext::ANTIALIAS to enable (you gussed it) antialiasing.
The following flags are available:
VGContext::ANTIALIAS- Enables geometry-based anti-aliasing. Useful for smoothing edges in rendering. May not be necessary with multi-sample anti-aliasing (MSAA).VGContext::STENCIL_STROKES- Utilizes the stencil buffer for stroke drawing. Ensures correct rendering of path overlaps and sharp turns, with each segment drawn only once. Slightly slower but provides precision.VGContext::DEBUG- Activates additional debug checks. Helpful for development and troubleshooting.
Beginnig and ending a frame
In your application's render loop you need to call beginFrame() and endFrame() on the VGContext object. The context will queue all draw commands until you call endFrame().
use GL\VectorGraphics\VGContext;

if (!glfwInit()) {
    throw new Exception('GLFW could not be initialized!');
}

// make sure to set the GLFW context version to the same
// version the GLFW extension has been compiled with, default 4.1
glfwWindowHint(GLFW_CONTEXT_VERSION_MAJOR, 4);
glfwWindowHint(GLFW_CONTEXT_VERSION_MINOR, 1);
glfwWindowHint(GLFW_OPENGL_PROFILE, GLFW_OPENGL_CORE_PROFILE);
glfwWindowHint(GLFW_OPENGL_FORWARD_COMPAT, GL_TRUE);

// Create a window
if (!$window = glfwCreateWindow(800, 600, "PHP GLFW Demo")) {
    throw new Exception('OS Window could not be initialized!');
}

glfwMakeContextCurrent($window);
glfwSwapInterval(1);

// initalize the a vector graphics context
$vg = new VGContext(VGContext::ANTIALIAS);

// Main Loop
while (!glfwWindowShouldClose($window))
{
    glClearColor(0, 0, 0, 1);
    glClear(GL_COLOR_BUFFER_BIT);

    // start a new vector graphics frame
    $vg->beginFrame(800, 600, 1);

    // DRAW STUFF HERE...

    // end the frame will dispatch all the draw commands to the GPU
    $vg->endFrame();

    // swap the windows framebuffer and
    // poll queued window events.
    glfwSwapBuffers($window);
    glfwPollEvents();
}

glfwDestroyWindow($window);
glfwTerminate();
The beginFrame() method takes 3 arguments:
width- The width of the window in points. This will almost always be the same as the width of your window.height- The height of the window in points. Just like the width, this will almost always be the same as the height of your window.devicePixelRatio- The ratio between the window's backing pixels and the window's points. This is usually1.0on normal displays and2.0on retina displays. You can find out the device pixel ratio of your window by callingglfwGetWindowContentScale().
Drawing
Now that we have a context and a frame, we can start drawing. The vector graphics API is very similar to the HTML Canvas API. If you have ever used the HTML Canvas API, you will feel right at home.
The first thing we need to do is create a path. A path is a collection of points, lines, curves and shapes. We can then stroke or fill the path to draw it to the screen.
Now that we have a path, we can start drawing shapes. The vector graphics API provides a few methods to draw basic shapes.
To set the color of a shape, we can use the fillColor() and strokeColor() methods.
The VGColor class provides a few static methods to create colors from a basic palette.
To fill a shape, we can use the fill() method. To stroke a shape, we can use the stroke() method.
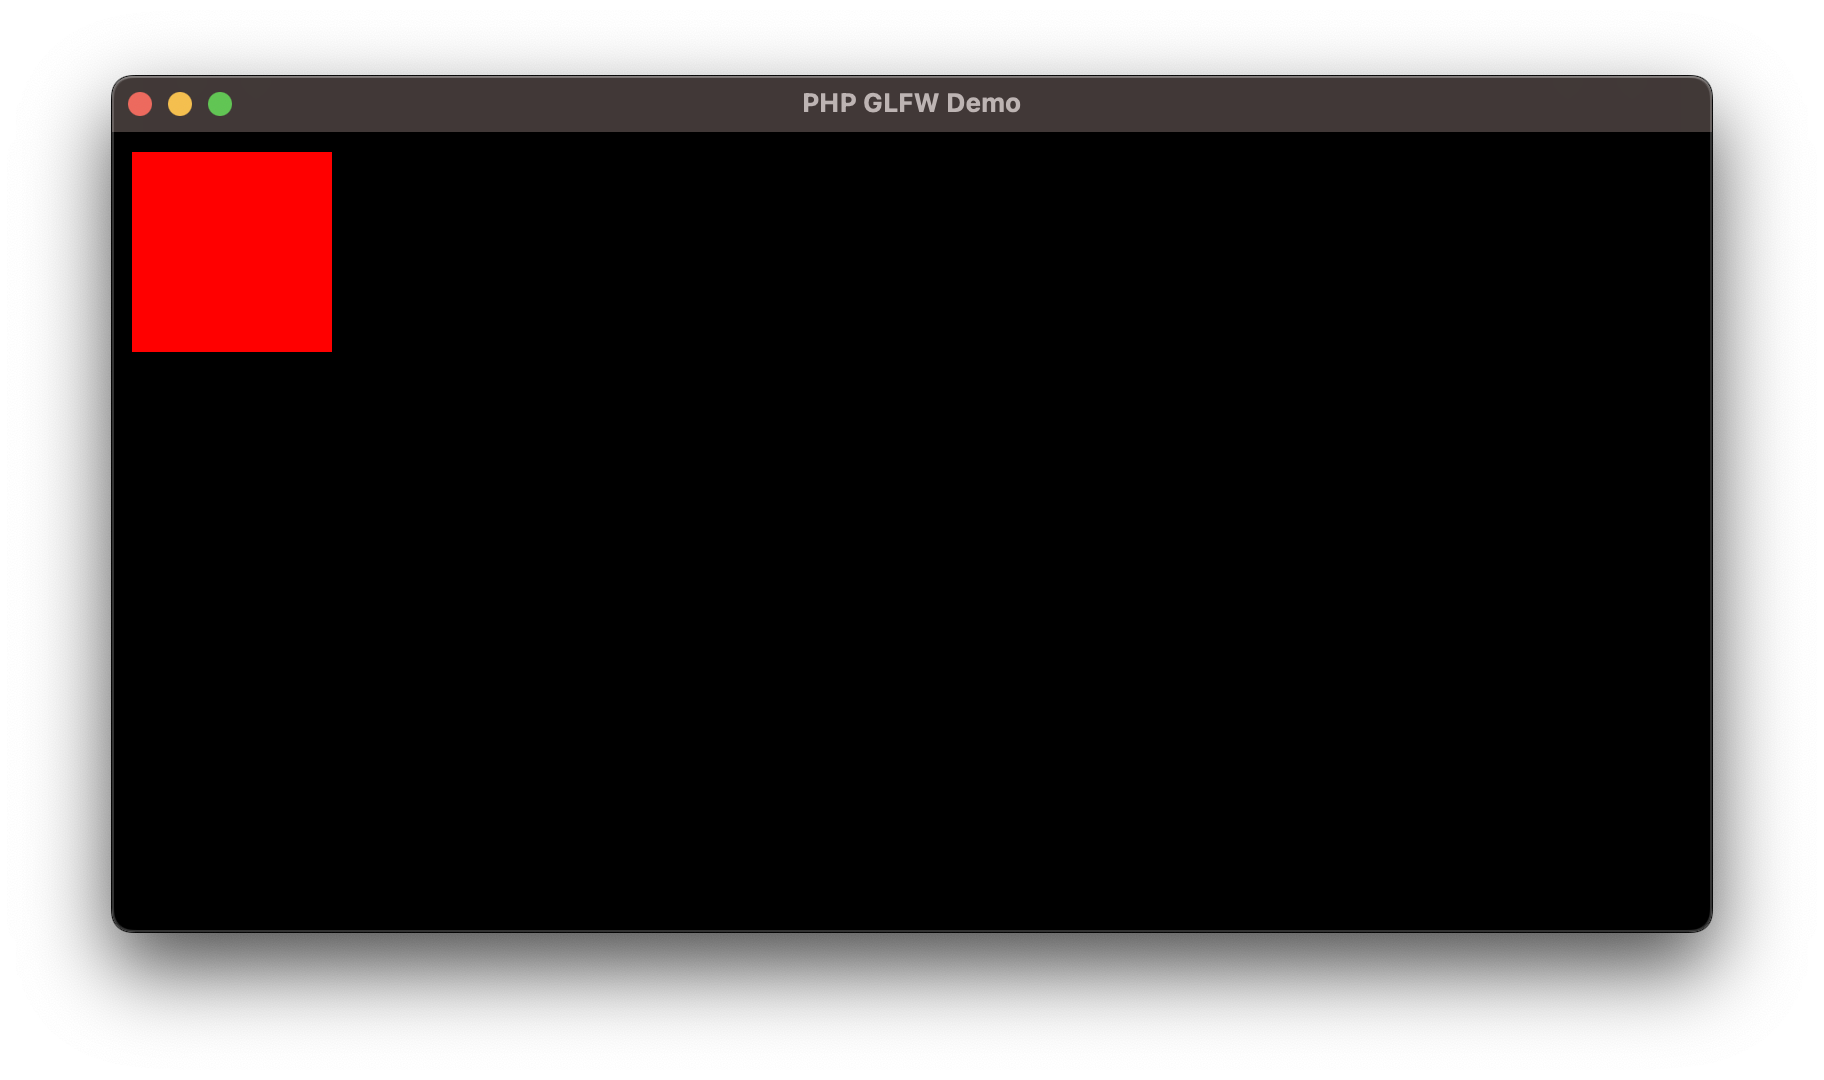
Putting it all together
All together, this is how you would draw a red rectangle to the screen.
use GL\VectorGraphics\VGColor;
use GL\VectorGraphics\VGContext;
if (!glfwInit()) {
throw new Exception('GLFW could not be initialized!');
}
// make sure to set the GLFW context version to the same
// version the GLFW extension has been compiled with, default 4.1
glfwWindowHint(GLFW_CONTEXT_VERSION_MAJOR, 4);
glfwWindowHint(GLFW_CONTEXT_VERSION_MINOR, 1);
glfwWindowHint(GLFW_OPENGL_PROFILE, GLFW_OPENGL_CORE_PROFILE);
glfwWindowHint(GLFW_OPENGL_FORWARD_COMPAT, GL_TRUE);
// Create a window
if (!$window = glfwCreateWindow(800, 600, "PHP GLFW Demo")) {
throw new Exception('OS Window could not be initialized!');
}
glfwMakeContextCurrent($window);
glfwSwapInterval(1);
// initalize the a vector graphics context
$vg = new VGContext(VGContext::ANTIALIAS);
// Main Loop
while (!glfwWindowShouldClose($window))
{
glClearColor(0, 0, 0, 1);
glClear(GL_COLOR_BUFFER_BIT);
// start a new vector graphics frame
$vg->beginFrame(800, 600, 1);
$vg->beginPath();
$vg->rect(10, 10, 100, 100);
$vg->fillColor(VGColor::red());
$vg->fill();
// end the frame will dispatch all the draw commands to the GPU
$vg->endFrame();
glfwSwapBuffers($window);
glfwPollEvents();
}
glfwDestroyWindow($window);
glfwTerminate();
Adding some interaction
To not end this "Getting Started" tutorial with a static image, let's add some interaction to our example. We are going to draw a circle that follows the mouse cursor.
To get the mouse position, we can use the glfwGetCursorPos() function.
Then we just replace our call to rect() with a call to circle() and use the mouse position as the center of the circle.
As simple as that, we now have a circle that follows the mouse cursor.
In the next chapter we are going to dive a bit more into the basics.
Additional Resources
- The vector graphics API is based on a modified version of the amazing NanoVG library.
Full API Reference
For the exhaustive list of every method, argument, and constant on the context, see the generated VGContext class reference.